Turned out fine but I never really loved it. The color was a bit too yellow for me. And, I never ironed it so it always looked like a hot mess. Whoopsie! I searched the internet to find something that would work but everything I found was too expensive and too plain for my liking. Based on the search results I knew that making a curtain would be the best idea. THEN, I tried to find fabric. What a stressful mess. I drug my poor hubby to fabric stores and looked at him like he was a lunatic when he couldn't see my "vision". Then I would pout and leave the store frustrated and empty handed. I'm a real treat to deal with sometimes. :) I ended up with something unexpected; regular curtain panels! I was browsing Pier 1 and they had these beautiful panels on clearance for $9.98 each!! Woo-to-the-hoo!

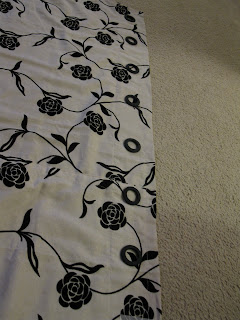
Excuse the bad fabric photo, I had a better one but it seems to have disappeared. I measured things up, pinned, and sewed the two pieces together. Only one seam this time, and it'll be behind the bathroom door most of the time. I hadn't figured out how I was going to hang the shower curtain until I stumbled upon this at JoAnn's:
A grommet kit that doesn't require a special tools - magic! I measured out where all the holes should be (well, actually Loren did it but somehow made it feel like I was useful), placed the grommet in place, and started tracing. The grommet kit comes with a stencil so you can make sure that you have the right sized hole. After I traced all the holes, I simply cut them all out and snapped the grommet pieces into place.
 |  |
I also failed at getting a picture of the grommet installation but I swear it's really as easy as lining the two pieces up with the fabric in between and snapping them into place. Then I was done! I was so excited to hang the curtain up. It gave me a run for my money - the stupid curtain rod kept slipping out of place and hitting me on the head. But I finally won.
I'm really happy with the way the curtain turned out. I was able to hang it higher and I just feel like it fits the space a lot better. It was tricky trying to get good photos in the bathroom but hopefully you can kind of see what's going on in there. Let me know what you think!


Love it! I had been wondering how easy the grommet kits were. I made cutains for Jude's room last month and was going to do it but opted to use the clip ones in case he pulled them. I didn't want him to pull the rod down too. =)
ReplyDeleteLooks great, Kristen!!
ReplyDelete